The Complete Midea Aircon Error Code Directory (2026): Diagnostic Guide for Singapore Homeowners
July 15, 2026
The Comprehensive Panasonic Aircon Error Code Directory (2026): Diagnostic and Troubleshooting Guide for Singapore Homeowners
July 17, 2026The Definitive Daikin Aircon Error Code Directory (2026): Diagnostic Guide for Singapore Homes
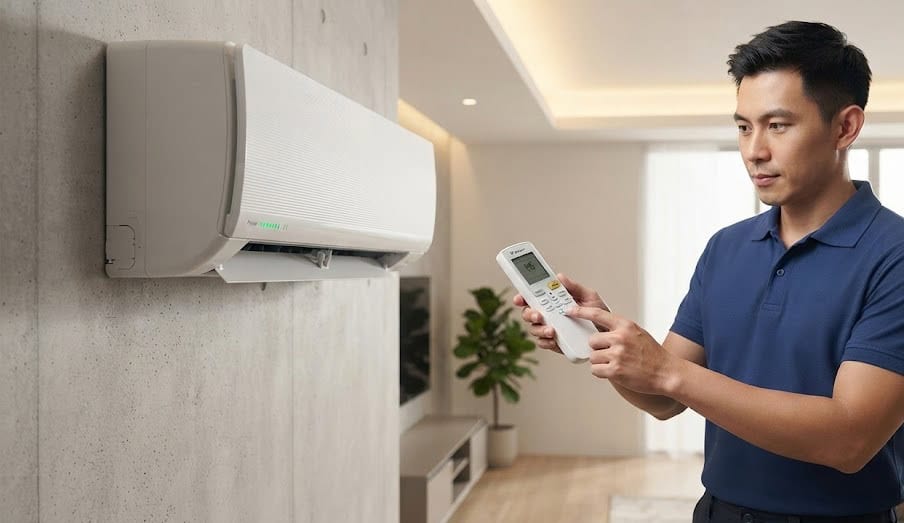
Extracting diagnostic fault codes on a Daikin residential split system using the remote controller.
The Definitive Daikin Aircon Error Code Directory (2026): Diagnostic Guide for Singapore Homes
If you own an air-conditioned home in Singapore, chances are high that you have a Daikin system installed. Known for pioneering variable refrigerant volume (VRV) systems and building highly reliable residential split series like the iSmile Eco and Revo, Daikin air conditioners are a staple across local HDB flats, condominiums, and landed properties. They are engineered to handle the relentless heat of our tropical microclimate. However, even high-end Japanese engineering can occasionally hit a operational roadblock. When a fault develops, the green power LED light on your indoor fancoil will stop glowing solid and start blinking continuously, accompanied by a sudden shutoff in cooling performance.
A flashing green power light on a Daikin unit is a system lockout protection feature. Rather than allowing the unit to run while a component is malfunctioning—which could cause catastrophic compressor damage or electrical hazards—the internal printed circuit board (PCB) stops operation. To solve this, Daikin includes a built-in self-diagnostic feature in every wireless and wired remote controller, allowing you to extract the exact alphanumeric fault code without using complex diagnostic tools.
This directory serves as the master technical reference for Daikin residential and commercial air conditioning systems in Singapore. We will walk through the exact steps to retrieve your error code using your remote control, provide an unfiltered, complete directory of every known Daikin fault code, and explain the physical root causes behind these errors to help you determine if a simple reset will fix it or if a professional HVAC technician is required.
How to Read and Extract Daikin Error Codes via Remote Control
When the green operation light on your Daikin fancoil is flashing, the unit does not show the fault code on its plastic front casing. Instead, you can retrieve the code directly from your standard wireless remote controller using a hidden query sequence.
Follow these exact steps to extract the active error code from your system:
- Step 1: Point and Prepare: Point your Daikin wireless remote controller directly at the indoor fancoil unit that is displaying the flashing green light.
- Step 2: Hold the Cancel Button: Locate the button labeled CANCEL on the remote panel. Press and hold the CANCEL button down for approximately 5 seconds. The current temperature reading on the LCD screen will disappear and be replaced by a flashing double zero display (“00”).
- Step 3: Cycle Through the Code Directory: Repeatedly press the CANCEL button one short press at a time. Each press will cycle through Daikin’s diagnostic codes in sequence (e.g., A1, A3, A5, C4, C9, E7, F3, U0, U4, L5). Each time a code is displayed on the remote screen, the remote sends a signal to the fancoil.
- Step 4: Identify the Long Beep: For every code that does not match the system’s fault, the fancoil will emit a brief, single beep. Continue pressing CANCEL until the fancoil emits a continuous, long beep (or a double beep followed by a long tone). The alphanumeric code shown on your remote screen at the exact moment of the long beep is your active error code.
- Step 5: Exit Diagnostic Mode: To return your remote controller to standard temperature display mode, hold down the CANCEL button again for 5 seconds, or simply leave the remote untouched for 1 minute until it automatically times out.
If your code reads “00”, it means no active hardware fault is logged in the system’s memory. If you extract a code starting with A, C, E, F, H, J, L, P, or U, locate it in the complete master directory below.
Part 1: Exhaustive Daikin Aircon Error Code Directory
The table below contains the complete list of error codes for all Daikin residential split systems (System 2, System 3, System 4, System 5) and commercial VRV/VRF multi-split systems operating in Singapore.
| Error Code | Fault Description | Summary Fix & Action Guide |
|---|---|---|
| 00 | System Normal / No Fault Detected | The system memory has no active error logged. If the light continues blinking, reset the master isolator switch. |
| A0 | Indoor Protective Device Activated | An external protective device connected to the indoor unit has tripped. Requires professional inspection. |
| A1 | Indoor Unit Control PCB Fault | The indoor fancoil main circuit board has suffered an internal EEPROM or processor failure. Requires professional PCB replacement. |
| A3 | Indoor Drain Level Control System Abnormality | Condensate water has reached critical capacity in the drain pan due to a choke or float switch defect. Requires professional drain line flushing. |
| A5 | Freeze-Up Protection / High-Pressure Control | Indoor heat exchanger coil is freezing up or running excessively hot. Wash air filters; if code persists, requires professional gas check. |
| A6 | Indoor Fan Motor Fault / Mechanism Lock | Indoor blower fan motor is locked, obstructed by dirt, or has a burned winding. Requires professional motor or blower wheel replacement. |
| A7 | Indoor Swing Flap Motor Fault | The motorized horizontal or vertical louver motor has failed or jammed. Requires professional louver motor replacement. |
| A8 | Indoor Power Supply Abnormality | Incoming electrical AC voltage to the fancoil is unstable or overcurrent detected. Requires professional electrical check. |
| A9 | Indoor Electronic Expansion Valve Fault | The electronic expansion valve (EEV) coil inside the indoor unit is defective or jammed. Requires professional EEV replacement. |
| AF | Indoor Drain Level High / Humidifier System Fault | Secondary water level sensor triggered or humidifier option overflowing. Requires professional drainage service. |
| AH | Air Filter Auto-Cleaning Mechanism Fault | Dust collector or auto-clean filter mechanism is physically stuck. Clear dust box and reset; requires service if recurring. |
| AJ | Capacity Setting Abnormality (Indoor PCB) | Capacity setting jumper chip on the indoor PCB is missing or incorrect. Requires professional board configuration. |
| C4 | Indoor Liquid Pipe Thermistor Fault | The heat exchanger coil liquid pipe temperature sensor is open or short-circuited. Requires professional thermistor replacement. |
| C5 | Indoor Gas Pipe Thermistor Fault | The heat exchanger coil gas pipe temperature sensor is open or short-circuited. Requires professional thermistor replacement. |
| C9 | Indoor Suction Air Thermistor Fault | The room return air intake temperature sensor has failed. Requires professional sensor replacement. |
| CC | Humidity Sensor System Fault | The relative humidity sensor in high-end units (e.g., Ururu Sarara) is defective. Requires professional sensor swap. |
| CJ | Remote Controller Thermistor Fault | The room temperature sensor built inside the wall remote controller has failed. Requires remote controller replacement. |
| E1 | Outdoor Unit Control PCB Fault | The main outdoor inverter control board has an internal hardware failure. Requires professional outdoor PCB replacement. |
| E3 | High-Pressure Switch Tripped (Outdoor) | System high pressure has crossed safety limits, often due to a dirty condenser coil. Requires professional pressure check & wash. |
| E4 | Low-Pressure Switch Tripped (Outdoor) | System low pressure has dropped dangerously low, indicating a major gas leak. Requires professional nitrogen leak test. |
| E5 | Inverter Compressor Motor Lock / Overcurrent | The inverter compressor motor has seized or is drawing extreme starting current. Requires professional compressor diagnostics. |
| E6 | Standard Compressor Overcurrent Lock | Non-inverter compressor or fixed-speed motor is locked under high mechanical load. Requires professional compressor replacement. |
| E7 | Outdoor Fan Motor Fault / Mechanism Lock | The outdoor condenser fan blade is obstructed or the fan motor winding is shorted. Requires professional fan motor replacement. |
| E8 | Input Overcurrent Protection Active | Total electrical current input to the compressor unit exceeds maximum limit. Requires professional inverter testing. |
| E9 | Outdoor Electronic Expansion Valve Fault | The outdoor main electronic expansion valve motor is shorted or stuck shut. Requires professional EEV body/coil replacement. |
| EA | Four-Way Reversing Valve Abnormality | Four-way valve failed to switch or temperature thermistors detect improper cycle. Requires professional valve replacement. |
| F3 | Abnormal Compressor Discharge Pipe Temperature | The compressor discharge pipe is dangerously hot due to low refrigerant or cycle blockage. Requires professional leak check & gas top up. |
| F6 | Refrigerant Overcharge / Heat Exchanger Abnormality | Excessive gas filled in system or outdoor coil cannot dissipate heat. Requires professional pressure adjustment. |
| H0 | Outdoor Sensor System Fault (General) | General sensor harness fault on the outdoor main control board. Requires professional sensor harness check. |
| H3 | High-Pressure Switch Mechanical Contact Fault | High-pressure safety switch contact is open or defective. Requires professional switch replacement. |
| H6 | Compressor Position Detection Sensor Fault | Inverter drive board cannot detect compressor rotor position feedback. Requires professional PCB or compressor check. |
| H7 | Outdoor Fan Motor Signal Abnormality | Outdoor fan motor speed feedback signal to the outdoor PCB is broken. Requires professional fan motor check. |
| H8 | Current Transformer (CT) Sensor Fault | The input current detection sensor on the main outdoor circuit board has failed. Requires professional outdoor PCB repair. |
| H9 | Outdoor Air Temperature Thermistor Fault | The outdoor ambient air temperature sensor is open or short-circuited. Requires professional sensor replacement. |
| J3 | Compressor Discharge Pipe Thermistor Fault | High-temperature discharge thermistor has failed or disconnected. Requires professional thermistor replacement. |
| J5 | Outdoor Suction Pipe Thermistor Fault | Suction line refrigerant temperature sensor is reading faulty resistance values. Requires professional replacement. |
| J6 | Outdoor Heat Exchanger Thermistor Fault | Outdoor condenser coil temperature sensor is open or shorted. Requires professional replacement. |
| J7 | Outdoor Liquid Pipe Thermistor Fault | Outdoor liquid line temperature sensor is defective. Requires professional replacement. |
| J8 | Equalizing Pipe Thermistor Fault | Refrigerant pressure equalizing pipe thermistor has failed. Requires professional replacement. |
| J9 | Outdoor Gas Pipe Thermistor Fault | Outdoor gas line temperature sensor is open or short-circuited. Requires professional replacement. |
| L1 | Inverter Main Circuit Hardware Fault | The outdoor inverter power module circuit has suffered an internal hardware failure. Requires professional inverter board replacement. |
| L4 | Inverter Heat Sink Temperature Rise Abnormality | Radiation fin on the power module is overheating, often due to dried thermal paste or dirty fins. Requires professional PCB maintenance. |
| L5 | Inverter Instantaneous Overcurrent Protection | Inverter power module detected a sudden current surge or compressor short-circuit. Requires professional compressor/PCB test. |
| L8 | Inverter Compressor Overload / Thermal Cut-out | Compressor motor winding temperature has exceeded thermal limits. Requires professional electrical diagnostics. |
| L9 | Inverter Compressor Startup Control Error | Compressor stalled or failed to synchronize during initial frequency acceleration. Requires professional inverter testing. |
| P1 | Inverter Power Supply Unbalance / Open Phase | Incoming supply voltage imbalance between electrical phases. Requires professional electrician or technical check. |
| P4 | Inverter Heat Sink Thermistor Fault | The thermistor measuring inverter power module temperature is defective. Requires professional PCB replacement. |
| U0 | Refrigerant Shortage / Gas Leak / Cycle Abnormality | System detected low gas pressure or expansion valve starvation. Requires professional pressure check and R32 top up. |
| U1 | Reverse Phase / Open Phase Power Supply Error | Power supply connection is wired with reversed phase sequence (3-phase models). Requires electrical wiring correction. |
| U2 | Power Supply Voltage Drop / Overvoltage Abnormality | Incoming AC voltage dropped below 180V or surged above 260V. Reset isolator; requires electrical check if recurring. |
| U4 | Transmission Error Between Indoor and Outdoor Units | Serial communication lost across S1/S2/S3 interconnecting control wiring. Requires professional cable and terminal check. |
| U5 | Transmission Error Between Remote & Indoor Unit | Communication failure between wired wall controller and fancoil PCB. Requires remote wiring check. |
| U7 | Transmission Error Between Outdoor Units (VRV) | Communication signal lost across outdoor condenser network cables. Requires professional system diagnostics. |
| U8 | Master / Slave Remote Controller Transmission Error | Wiring error or conflict between two remote controllers on one indoor unit. Requires remote setup re-configuration. |
| U9 | Indoor Unit Transmission Error in Same System | Communication failure between indoor fancoils connected to the same outdoor unit. Requires control wiring inspection. |
| UA | System Combination Error / Setting Abnormality | Indoor unit and outdoor unit capacity or PCB settings are incompatible. Requires professional model verification. |
| UF | Piping and Wiring Mismatch / Unperformed Check Run | Installation error where copper pipes and signal cables go to different fancoils. Requires professional installation correction. |
| UH | System Transmission Abnormality / Outdoor PCB Fault | Outdoor board microcomputer memory error or system-wide signal breakdown. Requires professional outdoor PCB replacement. |
Distribution of Common Daikin Fault Triggers in Singapore
In Singapore’s unique equatorial climate, certain Daikin error codes occur far more frequently than others. High ambient heat levels combined with relative humidity regularly exceeding 80% create severe operational demands. These conditions accelerate organic slime growth in drain pans and drive electrical corrosion on outdoor terminal blocks.
The chart below shows the statistical distribution of common Daikin fault triggers based on historical field service data across residential System 3, System 4, and commercial VRV installations in Singapore estates.
As shown in the breakdown, eighty percent of all Daikin aircon faults logged in Singapore stem from four specific failure modes: drain water overflow (A3), indoor-to-outdoor signal transmission loss (U4), refrigerant gas leaks (U0), and inverter overcurrent locks (L5/E5).
If your fancoil is showing one of these high-frequency codes, taking swift, informed diagnostic action is essential. To book a professional diagnostic checkup or schedule leak repairs, you can review our technical services on our aircon troubleshooting and servicing page.
In the next section, we will analyze the technical mechanics behind these common Daikin errors, outline safe DIY checks you can run at home, and clarify when professional component replacements are strictly required.
In-Depth Thermodynamic & Mechanical Analysis of Critical Codes
Deciphering an alphanumeric code displayed on your Daikin remote controller is only the first step. To permanently resolve a recurring issue, you must understand the underlying physical and mechanical failures that trigger these specific codes. In Singapore’s tropical climate, certain environmental factors accelerate specific system failures.
A3 Error: Indoor Drain Level Control System Abnormality
The A3 code is the single most common fault code logged by Daikin residential split units and ceiling cassette systems across Singapore HDB flats and condos. This fault is triggered when the water level inside your fancoil’s internal drain pan rises high enough to push up the safety float switch, cutting off electrical power to prevent water from overflowing onto your walls or custom carpentry.
In our local environment, where relative humidity levels regularly cross 80%, your fancoil extracts liters of water vapor from the air daily. This moisture mixes with airborne dust, skin cells, and pet dander to form an organic nutrient layer inside the plastic drain pan. This layer becomes a breeding ground for bacteria and fungi, which quickly grow into a thick, gelatinous biological slime (jelly).
This jelly eventually flows into your drain pipe, creating a complete choke. When the water has nowhere to go, it backs up into the pan, lifts the float switch, and triggers the A3 error. Clearing an A3 code requires a high-pressure vacuum flush of your drain lines to remove all biological jelly, followed by an anti-bacterial tablet placement in the pan to prevent future growth.
U0 Error: Refrigerant Shortage & Gas Leak Detection
The U0 code indicates that your Daikin system has detected a low refrigerant gas charge or expansion valve starvation. Daikin inverter systems detect low gas by continuously monitoring the indoor liquid pipe thermistor (C4) and gas pipe thermistor (C5), comparing these readings against compressor operating frequencies.
When your copper piping network develops a slow pinhole leak at a flare joint, the volume of liquid refrigerant entering the evaporator coil drops. This causes liquid refrigerant to evaporate prematurely, resulting in subcooling loss and an abnormal temperature difference across the thermistors. When the outdoor control board registers that the electronic expansion valve (EEV) remains fully open without achieving the required temperature drop, it logs code U0 and stops operation to protect the compressor from running dry. Resolving a U0 code requires high-pressure nitrogen testing to locate the exact leak site, brazing the joint, vacuuming the loop, and performing an R32 top up.
U4 Error: Transmission Loss Between Indoor and Outdoor Units
The U4 error indicates a total breakdown in serial data communication between the indoor fancoil units and the outdoor compressor. To coordinate variable cooling cycles, the indoor and outdoor control boards must continuously exchange serial data signals along an interconnecting three-core cable (S1, S2, and S3 terminals).
The S1 terminal carries 230V AC active line voltage, S2 acts as the neutral line, and S3 carries a 0V to 24V DC pulsing serial data signal. In Singapore, these transmission failures are commonly caused by two factors:
- Corroded Terminal Connections: The high moisture content in our outdoor air accelerates corrosion on the copper screw terminals inside your outdoor condenser unit. This corrosion increases electrical resistance, distorting or completely blocking the digital communication signal between the units.
- Pest Intrusion: The outdoor condenser unit is warm and sheltered, making it a highly attractive nesting site for small pests, particularly house geckos. These geckos crawl onto the back of the active outdoor inverter PCB to seek warmth, where they bridge live high-voltage tracks to low-voltage communication lines, causing a short-circuit that burns out the transmission IC chip and triggers a permanent U4 code.
F3 Error: Abnormal High Discharge Pipe Temperature
The F3 code is a high-priority thermal protection error. It is triggered when thermistor J3, which is clamped directly to the compressor’s discharge pipe, registers an operating temperature exceeding 120 degrees Celsius.
Under normal conditions, returning suction gas from the indoor fancoil cools the compressor motor while carrying heat away. However, if your system suffers from a severe gas leak (U0) or a blocked electronic expansion valve (E9), the compressor runs without sufficient refrigerant gas. Without gas to cool the internal motor windings, mechanical friction causes the discharge temperature to spike rapidly. If left unchecked, this extreme heat degrades the synthetic compressor oil and burns the motor insulation. The F3 code cuts power instantly to prevent permanent compressor failure.
5-Year Financial & Performance Risk Profile of Common Codes
When your Daikin aircon displays an error code, choosing to ignore it and continuing to force the system to run can lead to serious mechanical damage. Many minor sensor faults can be resolved cheaply, but ignoring them forces the compressor to run under abnormal thermal conditions, leading to premature motor failure.
The table below compares the long-term operational and financial consequences of addressing critical Daikin codes early versus ignoring them.
| Active Fault Code | Monthly Power Impact | Immediate Repair Cost (SGD) | 5-Year Structural Risk | Recommended Action Pathway |
|---|---|---|---|---|
| A3 (Water Overflow) | Zero (System locked out) | $80 – $180 (High-pressure vacuum flush) | High (Water damage to ceiling & walls) | Perform high-pressure drain line flush and place anti-bacterial tablets |
| U0 (Low Refrigerant) | Spikes up to 30% (Compressor ramps continuously) | $250 – $450 (Pressure test + R32 recharge) | High (Compressor thermal burnout / F3) | Perform nitrogen leak test, seal flare joints, vacuum and recharge |
| U4 (Signal Loss) | Zero (System locked out) | $120 – $220 (Terminal block / wire swap) | Minimal (Electrical safety lock active) | Inspect outdoor terminals for corrosion; replace S2/S3 control cables |
| F3 (Discharge Overheat) | Spikes up to 25% (Thermal inefficiency) | $280 – $550 (Leak repair + sensor check) | Extreme (Total compressor lockup) | Power down immediately; perform leak testing and thermistor J3 check |
As the risk table clearly shows, addressing fault codes early protects your wallet from expensive future repairs. Continually resetting a system to bypass safety codes like U0 or F3 forces your compressor to run under extreme thermal stress, leading to motor burnout and requiring a complete system replacement.
Homeowner Safe DIY Troubleshooting Checklist
When your aircon displays an error code, you do not always need to pay for a technician immediately. Homeowners can safely carry out a few basic, non-invasive diagnostic checks to see if the issue is a simple glitch that can be resolved with a quick reset.
1. The Hardware Reset (Isolator Switch Cycle)
Modern inverter air conditioning systems are essentially complex, wall-mounted computers. Like any computer, the internal microprocessors can occasionally experience software lockups, memory buffers running full, or minor power spikes that cause the communication chip to crash, throwing a false U4 or U2 error.
To perform a hardware reset, locate your aircon’s master rotary isolator switch (usually found on your service yard wall, external aircon ledge, or balcony) and turn it to the “OFF” position. Alternatively, flip the dedicated aircon circuit breaker inside your home’s DB box to “OFF”. Leave the system completely powered down for at least 15 minutes. This allows the high-capacity capacitors on the outdoor inverter board to drain their stored charge completely, resetting the board’s volatile memory. Flip the switch back to “ON” and start the unit. If the code was caused by a temporary electrical glitch, the system will restart and run normally.
2. Static Pressure Filter Wash
If your system is displaying an A5 (freeze protection) code, the issue is often caused by a severe restriction in airflow across your indoor evaporator coils. When your mesh dust filters are heavily clogged, the fancoil’s blower fan cannot pull enough warm room air across the freezing coils.
Without sufficient warm air to heat the coils, the temperature of the refrigerant drops below freezing, causing the condensate water on the fins to turn into solid ice. The system detects this abnormal temperature drop and cuts power to prevent compressor damage. Slide out your indoor filters, wash them under a tap to remove all dust, let them dry completely, and reinstall them. This simple step restores proper airflow and often resolves the A5 error permanently.
3. Clearing Drainage Discharge Outlets
If your system is throwing an A3 water overflow code, check where your condensate pipe discharges. In most HDB flats, this pipe runs along the wall and discharges into a floor trap in your kitchen or toilet. Over time, hair, soap scum, and dirt can block this floor trap, causing water to back up into the aircon drain pipe. Ensure your floor trap is completely clear and free of standing water to allow your aircon to drain freely under gravity.
Professional Verification & Engineering Assurance: Evaluating these complex regulatory and mechanical requirements is much easier with professional support. Operating as an NEA-Licensed cleaning and technical service contractor since 2011, our expert team has built trusted relationships with over 43,000 Facebook followers and maintains a solid 4.8-star Google review rating. We carry out structural checks, pressure testing, and chemical restorations with complete transparency, ensuring your home remains cool and fully compliant with all local housing guidelines.
Frequently Asked Questions about Daikin Aircon Error Codes
Why is my Daikin power light blinking, but the remote displays code “00”?
A “00” reading on a Daikin remote controller means no active error is currently being transmitted to the remote during that specific query attempt. If the power light continues blinking, you must cycle through the full code directory by pressing the CANCEL button repeatedly while pointing the remote directly at the fancoil. The code displayed when the unit emits a long, continuous beep is your actual active fault.
How much does it cost to replace a Daikin outdoor inverter PCB in Singapore in 2026?
The cost of replacing a main outdoor inverter circuit board (E1 or L1) in 2026 typically ranges between $380 and $680, depending on your specific compressor capacity (System 3 or System 4). For modern Daikin inverter series like the iSmile Eco, we recommend using only original OEM replacement boards to preserve system performance and manufacturer warranty coverage.
Can I run my Daikin aircon safely if code U0 (low gas) is flashing?
No, you should never continue running your aircon with an active U0 code. Running a system short on gas prevents the returning refrigerant from cooling the compressor motor, leading to extreme friction heat, code F3 (discharge overheat), and eventual compressor motor burnout. Power down the system immediately and contact a professional technician to perform pressure testing and gas leak repair.
Will turning off the isolator switch permanently fix code U4?
Power cycling the isolator switch (turning it off for 15 minutes) can clear temporary communication glitches caused by electrical line noise or power surges. However, if the U4 code was triggered by a physical failure—such as corroded terminal screws, a severed wire, or a gecko short-circuiting the PCB tracks—the code will reappear within minutes of turning the unit back on. These physical issues require technician inspection.
Is a Daikin swing compressor repairable if code E5 or L5 appears?
Code E5 or L5 indicates an instantaneous overcurrent or locked rotor condition inside the compressor. If the issue is caused by a faulty inverter power module (IPM) on the PCB, replacing the circuit board can resolve the problem. However, if the compressor’s mechanical swing piston has seized or the motor windings have shorted, the compressor assembly itself must be replaced or the entire outdoor unit upgraded.
Conclusion & Renovation Strategy
Deciphering your Daikin aircon’s error codes is the key to maintaining a comfortable, efficient, and dry home. By extracting codes via your remote controller, you can take fast, correct action before a minor sensor fault escalates into a serious compressor failure.
If your system displays an error code that cannot be resolved with a simple filter wash or isolator reset, working with certified, experienced technicians is highly important. Our professional diagnostic team has the expertise and specialized equipment needed to locate physical leaks, replace damaged PCBs, and restore your system to its original performance. If your old compressor has reached the end of its design life and repairs are no longer cost-effective, we can also help you plan a full system upgrade to a modern, energy-efficient five-tick inverter model. Explore your options and schedule an appointment on our premium Daikin service page today.